Quickstart for Campaigns
Get started and create your first Sourcegraph campaign in 10 minutes or less.
Introduction
In this guide, you'll create a Sourcegraph campaign that appends text to all README.md files in all of your repositories.
For more information about campaigns see the "Campaigns" documentation and watch the campaigns demo video.
Requirements
- A Sourcegraph instance with some repositories in it. See "Quickstart" on how to setup a Sourcegraph instance.
- A local environment matching "Requirements" to create Campaigns with the Sourcegraph CLI.
Install the Sourcegraph CLI
In order to create campaigns we need to install the Sourcegraph CLI (src).
-
Install the version of
srcthat's compatible with your Sourcegraph instance:macOS:
curl -L https://YOUR-SOURCEGRAPH-INSTANCE/.api/src-cli/src_darwin_amd64 -o /usr/local/bin/src
chmod +x /usr/local/bin/src
Linux:
curl -L https://YOUR-SOURCEGRAPH-INSTANCE/.api/src-cli/src_linux_amd64 -o /usr/local/bin/src
chmod +x /usr/local/bin/src
Windows: see "Sourcegraph CLI for Windows"
-
Authenticate
srcwith your Sourcegraph instance by runningsrc loginand following the instructions:src login https://YOUR-SOURCEGRAPH-INSTANCE
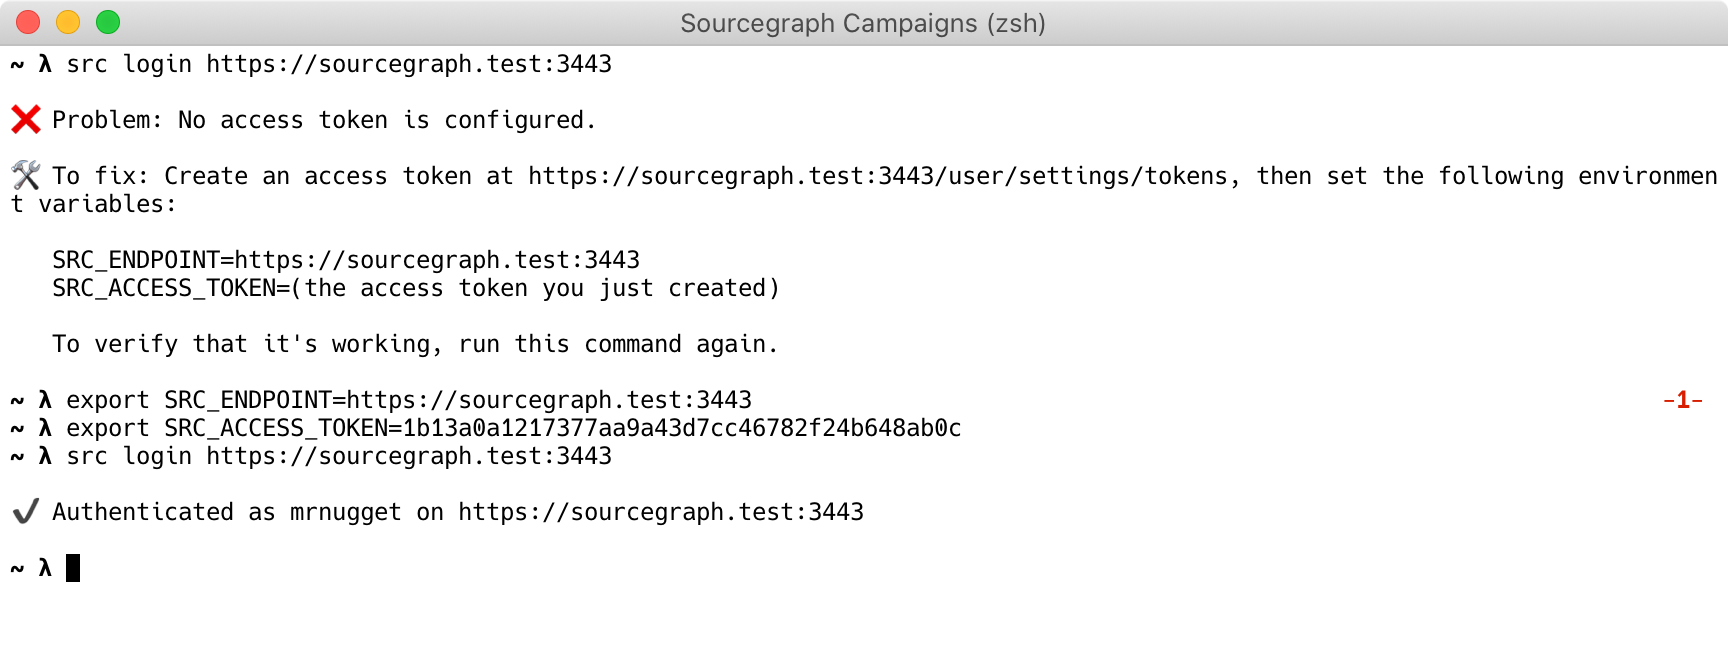
Once src login reports that you're authenticated, we're ready for the next step.
Write a campaign spec
A campaign spec is a YAML file that defines a campaign. It specifies which changes should be made in which repositories and how those should be published on the code host.
See the "Campaign spec YAML reference" for details.
Save the following campaign spec as hello-world.campaign.yaml:
name: hello-world
description: Add Hello World to READMEs

# Find all repositories that contain a README.md file.
on:
  - repositoriesMatchingQuery: file:README.md

# In each repository, run this command. Each repository's resulting diff is captured.
steps:
  - run: echo Hello World | tee -a $(find -name README.md)
    container: alpine:3

# Describe the changeset (e.g., GitHub pull request) you want for each repository.
changesetTemplate:
  title: Hello World
  body: My first campaign!
  branch: hello-world # Push the commit to this branch.
  commit:
    message: Append Hello World to all README.md files
  published: false
Create the campaign
Let's see the changes that will be made. Don't worry---no commits, branches, or changesets will be published yet (the repositories on your code host will be untouched).
-
In your terminal, run this command:
src campaign preview -f hello-world.campaign.yaml
-
Wait for it to run and compute the changes for each repository.

-
When it's done, click the displayed link to see all of the changes that will be made.

-
Make sure the changes look right.

-
If you want to modify which changes are made, edit the
hello-world.campaign.yamlfile, rerun thesrc campaign previewcommand and open the newly generated preview URL. -
Click the Apply spec button to create the campaign. You should see something like this:

You created your first campaign! The campaign's changesets are still unpublished, which means they exist only on Sourcegraph and haven't been pushed to your code host yet.
Publish the changes
So far, nothing has been created on the code hosts yet. For that to happen, we need to publish the changesets in our campaign.
Publishing causes commits, branches, and pull requests/merge requests to be created on your code host.
You probably don't want to publish these toy "Hello World" changesets to actively developed repositories, because that might confuse people ("Why did you add this line to our READMEs?").
Configure code host credentials
Since campaigns need write permissions to open changesets, you'll need to add a personal access token for each code host you'll be publishing changesets on. This is a one time operation that you don't need to do for each campaign.
See "Configuring user credentials" for more detail on adding and removing user tokens beyond the quickstart below, or "Code host interactions in campaigns" for details on what the permissions are used for.
To add a personal access token:
- From any Sourcegraph page, click on your avatar at the top right of the page.
- Select Settings from the dropdown menu.
- Click Campaigns on the sidebar menu.
- Click Add token next to the code host you want to configure.
- Go to the code host and create a personal access token with the exact scopes or permissions required, which are noted below the token text field. For more provider-specific detail, please refer to "GitHub", "GitLab", or "Bitbucket Server".
- Click Add token to save the token.
The red circle next to the code host will now change to a green tick. Sourcegraph has everything it needs to publish changesets to that code host!
Publishing changesets
Now that you have credentials set up, you can publish the changesets in the campaign. On a real campaign, you would do the following:
-
Change the
published: falseinhello-world.campaign.yamltopublished: true.
-
Run the
src campaign previewcommand again and open the URL.
-
On the preview page you can confirm that changesets will be published when the spec is applied.

-
Click the Apply spec button and those changesets will be published on the code host.

Congratulations!
You've created your first campaign! 🎉🎉
You can customize your campaign spec and experiment with making other types of changes.
To update your campaign, edit hello-world.campaign.yaml and run src campaign preview again. (As before, you'll see a preview before any changes are applied.)
To learn what else you can do with campaigns, see "Campaigns" in Sourcegraph documentation.